Resources Hub
- Home
- Resources Hub
- Blackboard Original
- Blogs: Using Blogs for Summative Assessments
Blogs: Using Blogs for Summative Assessments
Blogs can be used for summative assessments. A blog on Blackboard is a powerful online tool that is designed for individual students to share their ideas on a topic with classmates.
The blogs on Blackboard have a commenting feature so that fellow students can respond to one another’s thoughts on the activity blogged about. The purpose of pedagogic blog activities is to encourage students to learn to clearly express their ideas. Blogs are a social learning tool.
In Blackboard, instructors create and manage blogs, and only enrolled users can view and create entries and comments in them. Blogs can be used for graded assignments or to gather opinions without assigning a grade.
Step One: Adding a Blog Area to Blackboard
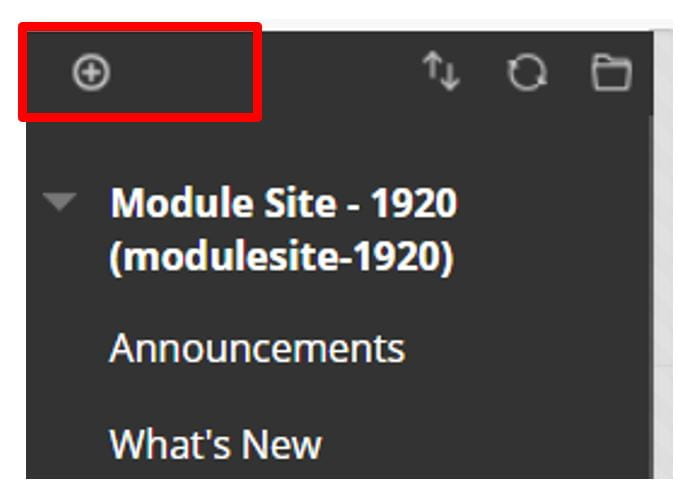
- Click on the plus icon on top of the menu bar.
- Click on the Tool link option.
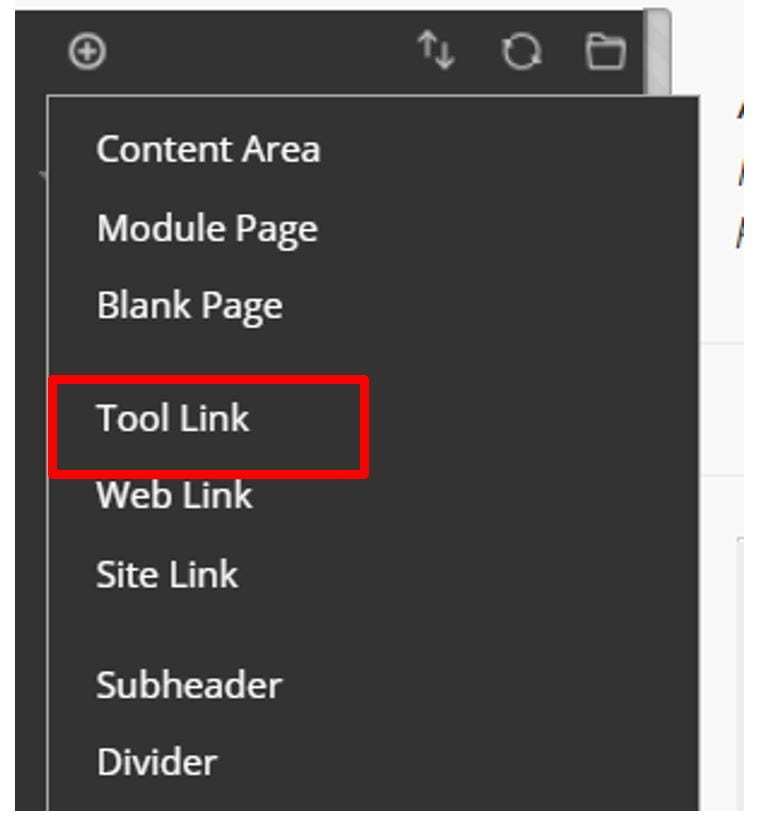
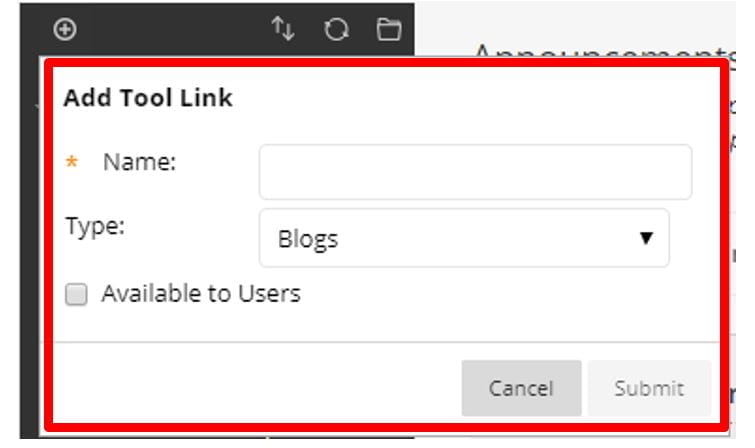
- Click on Blogs from the drop-down, give the item a name describing the activity and tick Available to users.
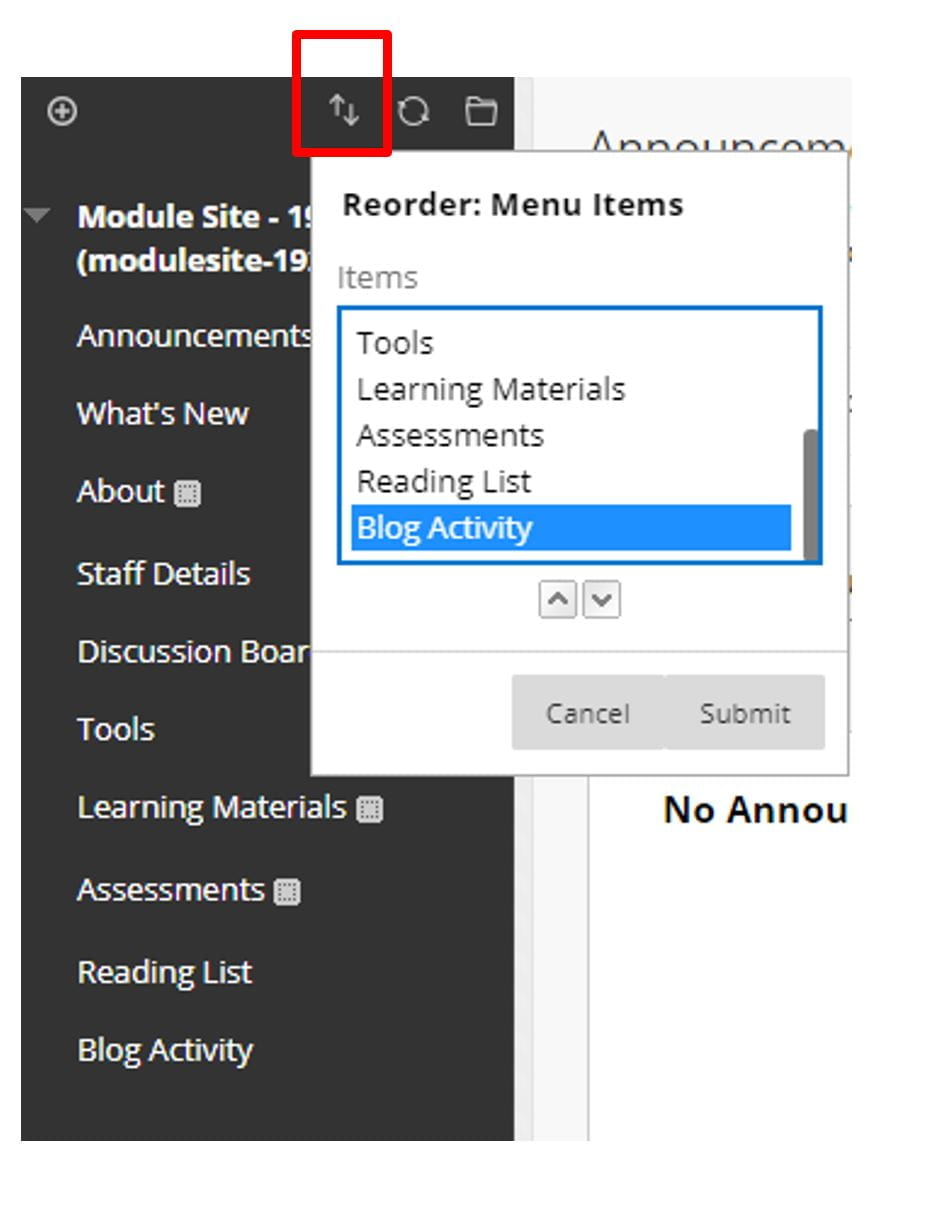
- Move the item up on the menu bar using the Reorder menu items tool.
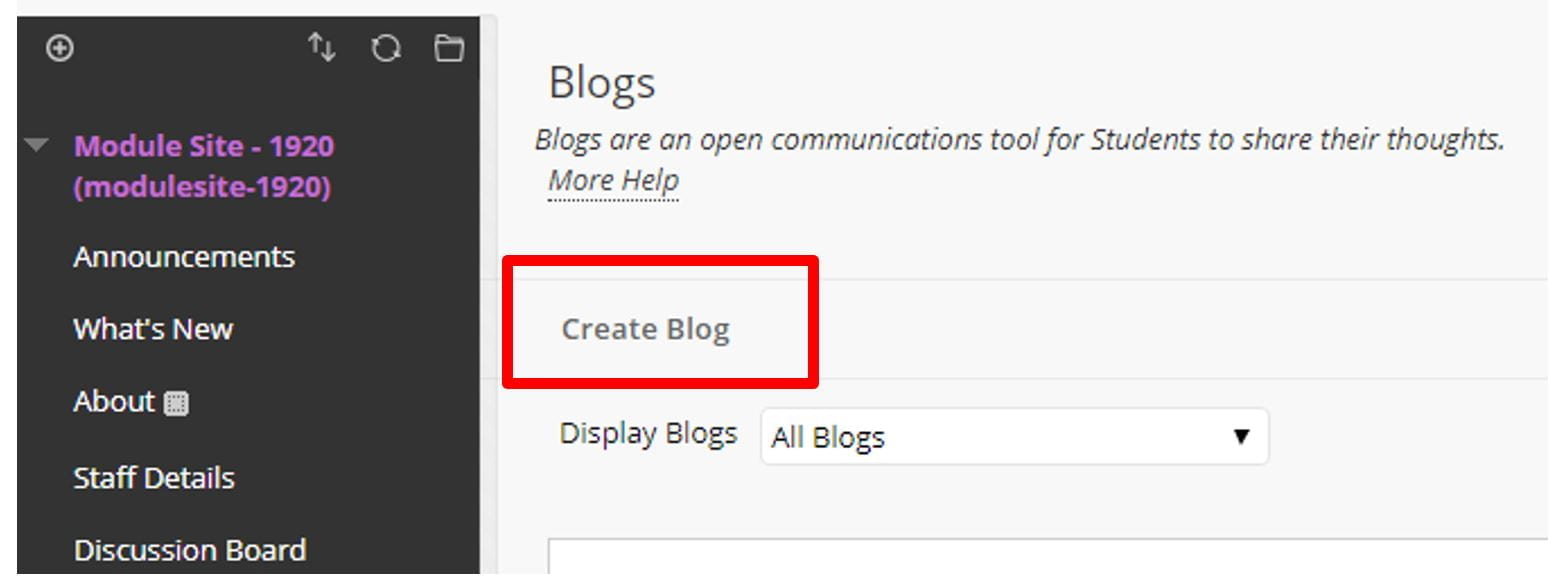
- Click on the menu item and Create Blog.
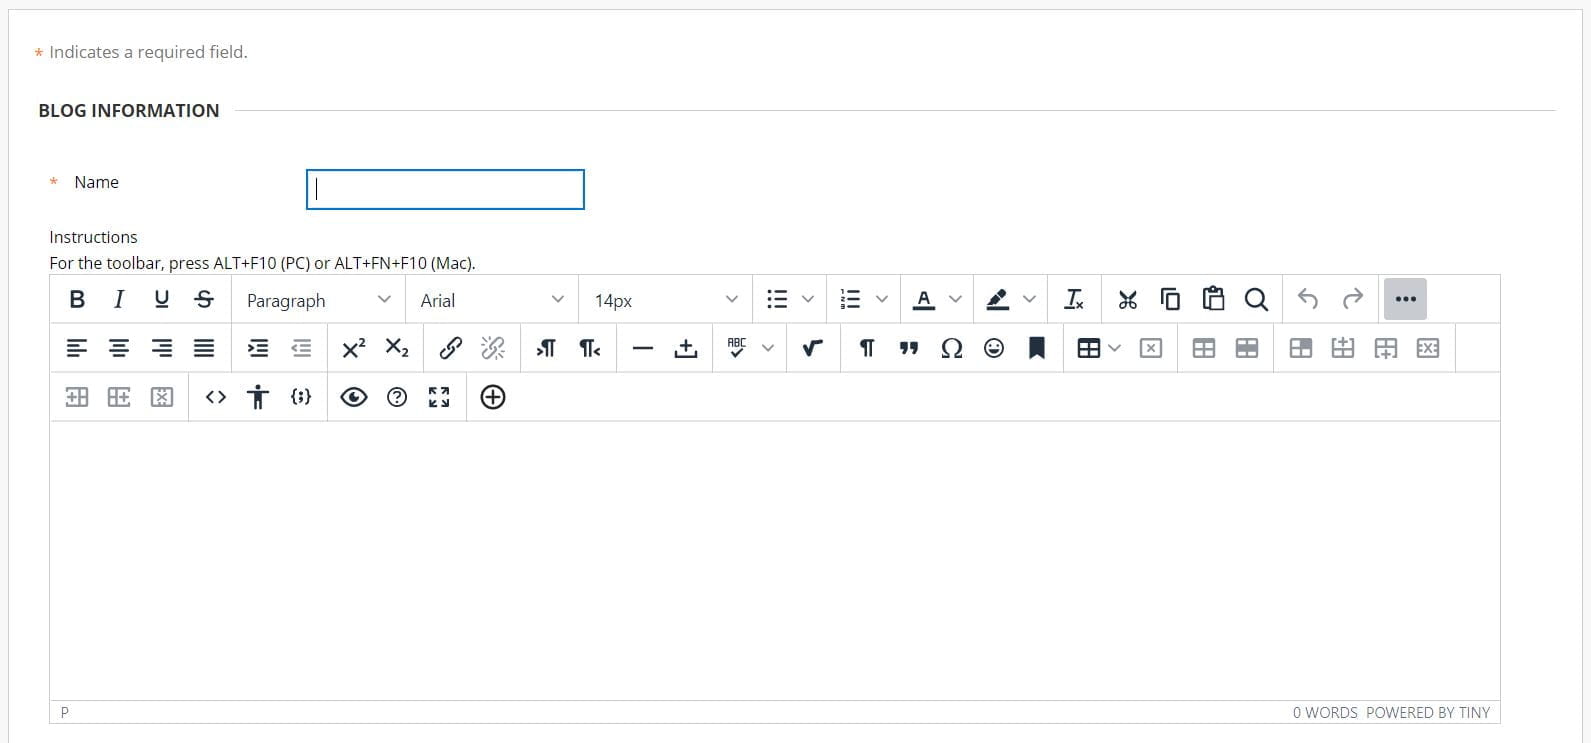
- The Create Blog wizard is comprised of six sections. For the first section, type in the Name of the activity and Instructions for students.
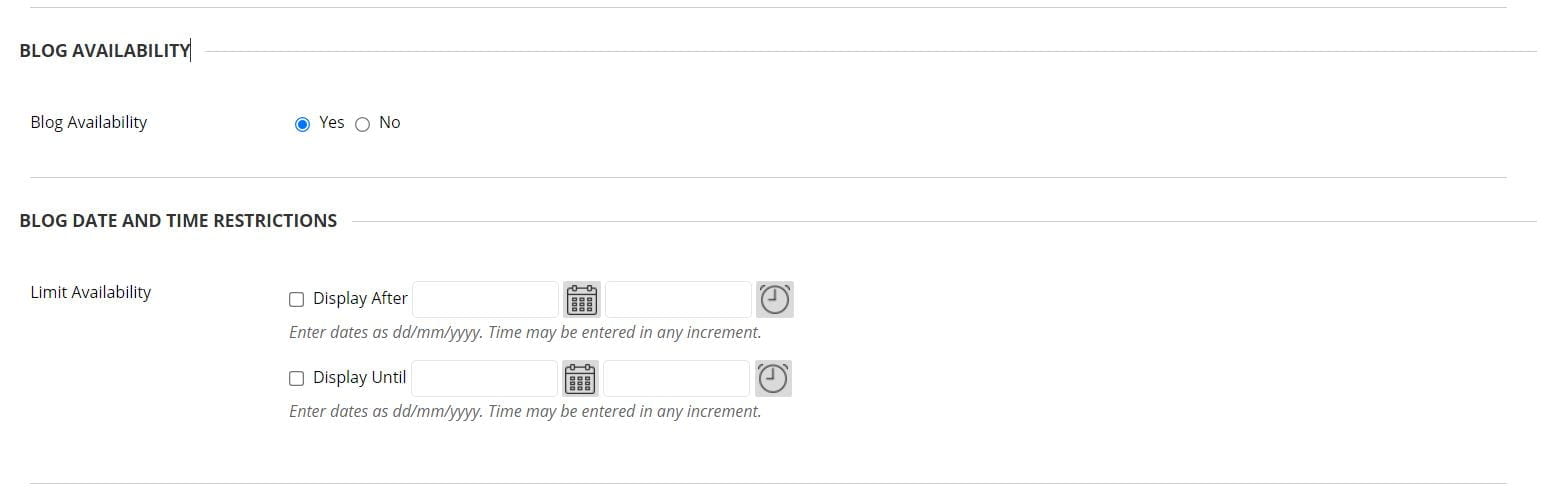
- Fill in the Blog Date and Time Restrictions area.
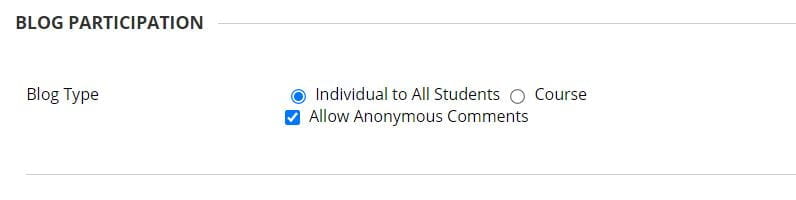
- Fill in the Blog Participation details. Usually blogs would be individual to all students. You may want to untick Anonymous Comments on blogs so that students can only comment on each other’s blogs non-anonymously.
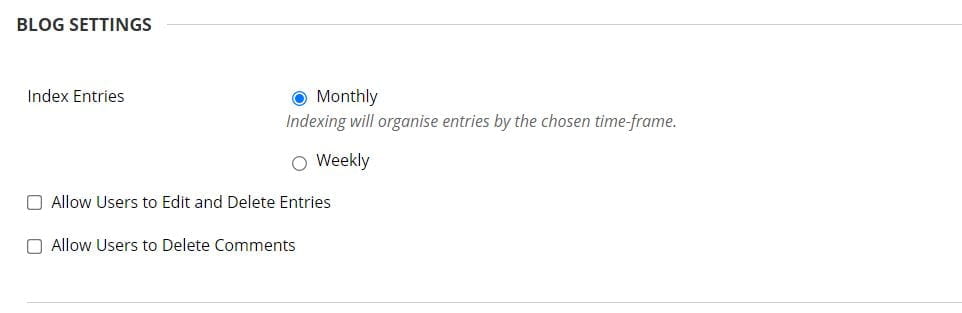
- In the Blog Settings section, select how you want the entries indexed. Weekly is optimum. Decide whether you want to allow students to delete and edit entries after posting (recommended) and whether to delete their comments after posting (recommended).
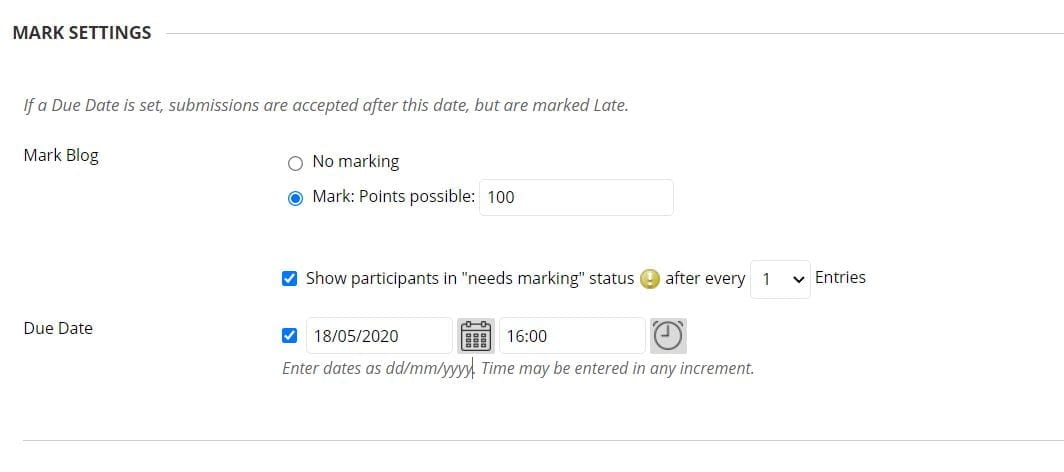
- In the Grade Settings section, select Grade: Points Possible and type the number of Points possible as 100. Set Needs Marking to 1 and set the Due Date. After you enable grading, a column is created automatically in the Grade Centre.
- Click Submit. Your Blog is now almost ready to use with students.
Step Two: Hiding the Total Column and the Blog column in Grade Centre
- Go to Full Grade Centre.

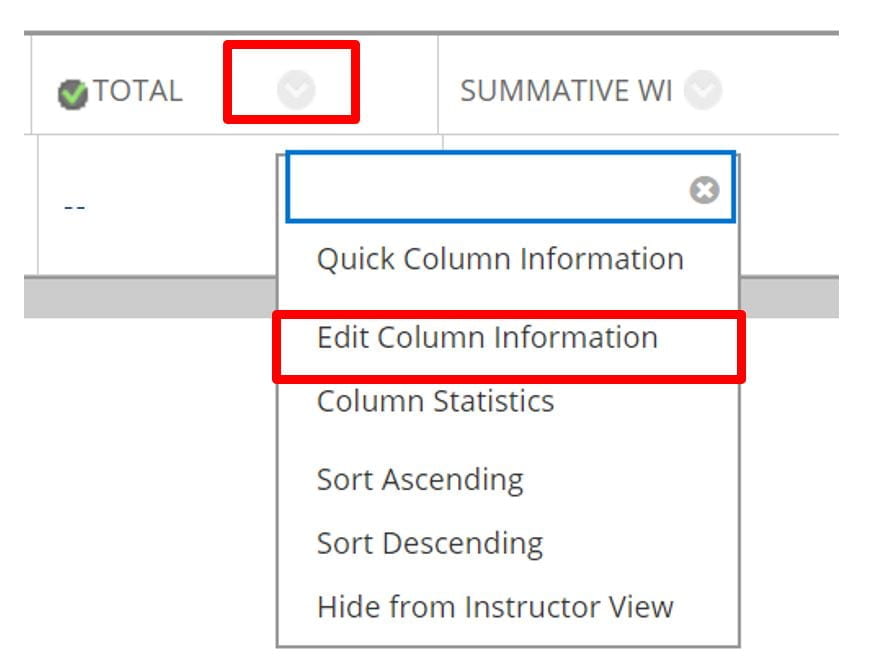
- Click the chevron next to the Total column and go to Edit Column Information.
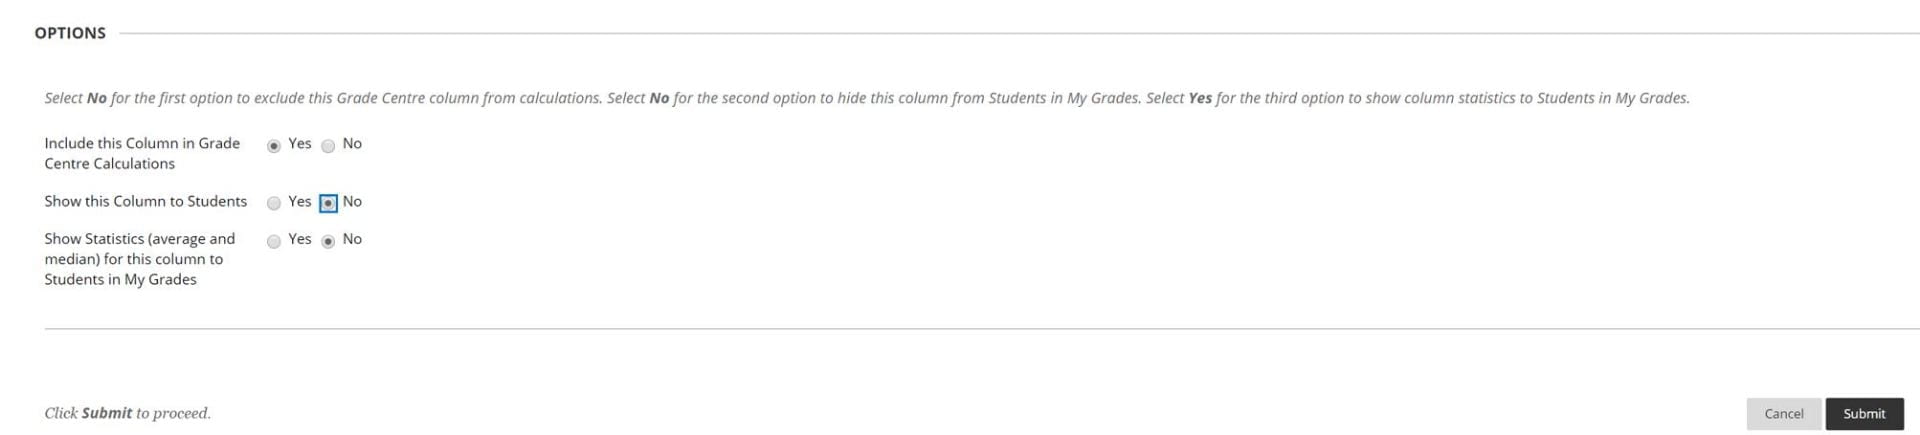
- In the Options area, make sure Show this Column to Students is set to No.
- Do the same for the column relating to the Blog summative assignment. Your summative blog assessment is now ready to be used.
Step Three: Unhiding the Blog column in Full Grade Centre to release marks
On the day you are releasing marks and feedback, you need to go to Grade Centre, click the chevron for the Blog column, choose Hide from Students (on/off), and the red line will disappear.