Resources Hub
- Home
- Resources Hub
- Blackboard Original
- Creating a Blackboard Rubric
Creating a Blackboard Rubric
This helpsheet will guide you through the process of setting up and using a rubric in Blackboard for your Blackboard assessments. This process is different to the creation and use of rubrics on Turnitin. That process can be found under the Turnitin section of our Resources Hub.
Creating a Rubric in Blackboard
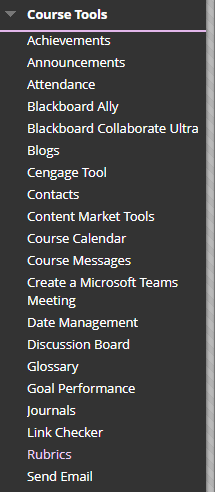
- To create a rubric on Blackboard, first navigate to your module site and find ‘Course Tools’ on the left hand menu, before navigating to ‘Rubrics’ in the sub menu.
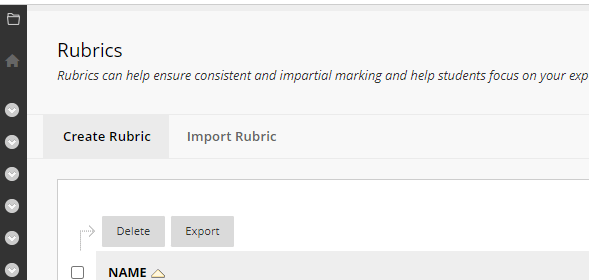
- From the Rubrics screen, you will have several options. Choose ‘Create Rubric’ to make a new rubric. You can also edit and manage other rubrics you have previously created from this page, or import a rubric you have downloaded from elsewhere on Blackboard. Note: import does not mean you can import a word or excel rubric, you would need to have downloaded a rubric from elsewhere on Blackboard to use the ‘import’ function.
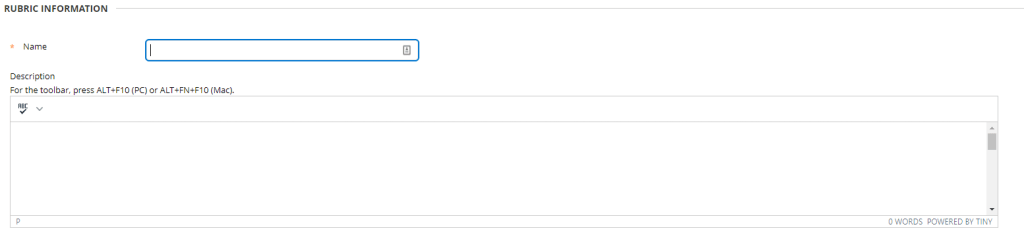
- Complete the ‘Rubric Information’ section by adding a title and description for your rubric. The title would usually include the module code and the name of the assessment, so that it is easier to find later on.
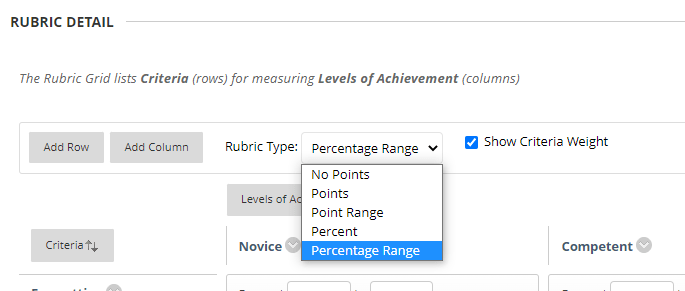
- Under ‘Rubric Detail’ complete the top line and choose the rubric type. There are a number of options here. However, only two are applicable. If you wish to use the rubric to generate a score, you should choose ‘Percentage Range’. If you wish to create a qualitative rubric and not generate a score, choose ‘No Points’.
- We are going to create a rubric with a percentage range and score generation. We will start with the critera or learning objectives, shown down the left hand side. For each critera, click the grey arrow to the right and choose ‘Edit’ to add the title for this objective. You will have a small number of characters, so don’t make your title too long.
- Enter your percentage weighting for this critera or learning objective.
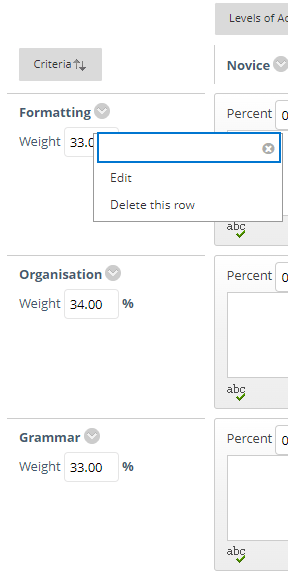
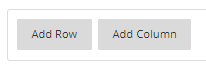
- Repeat steps 5 and 6 to add all your critera or learning objectives. You can copy and paste your titles from a Word or Excel rubric you may have created. If you need to add extra rows, you can use the buttons at the top of the rubric. All learning objectives should add up to 100% by the time you are finished editing this section.
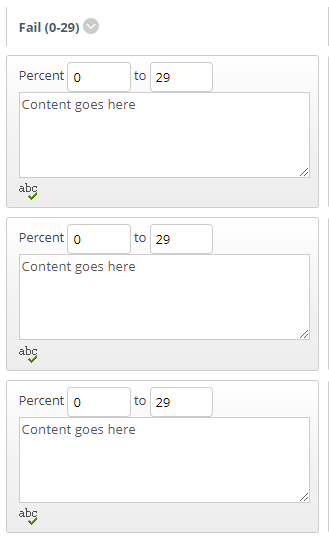
- Now complete the ‘Levels of Achievement’ section, or the bands for each mark. You can edit each column by pressing the grey arrow and selecting ‘Edit’. For each title you should enter the band. i.e. “Fail (0-30)” or “High First (80-100)”. Complete all the titles for each column. You can add more columns using the buttons above the rubric.

- You will now have an empty rubric table which has the correct critera or learning objectives and the correct marking ranges. You now need to complete the rest of the table.
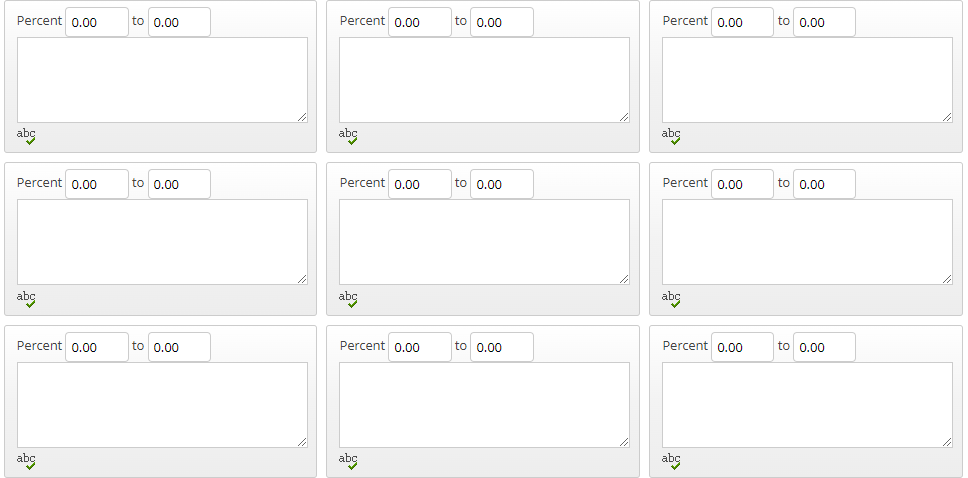
- For each column, re-enter the banding scores for every row, all the way down the table. Repeat this step for every other column.
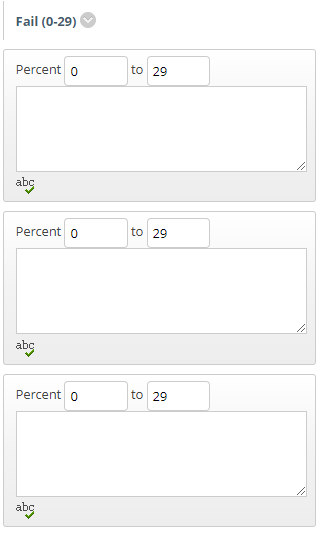
- Now add a description for each cell in your table or rubric. You can enter these manually, or copy and paste the content from your Word or Excel rubric.
- Your rubric is now complete. Check that the total percentage adds up to 100% and click ‘Submit’.

Applying a Rubric to a Blackboard Assignment
Once you have created your Blackboard rubric you can assign it to a submission. Note: You should add your rubric to the assignment before you start marking. You will not be able to do this after you have started marking.
- Navigate to ‘Assessments’ on your Blackboard module site.
- Find the relevant assessment and click the grey arrow to the right, choosing ‘Edit’.
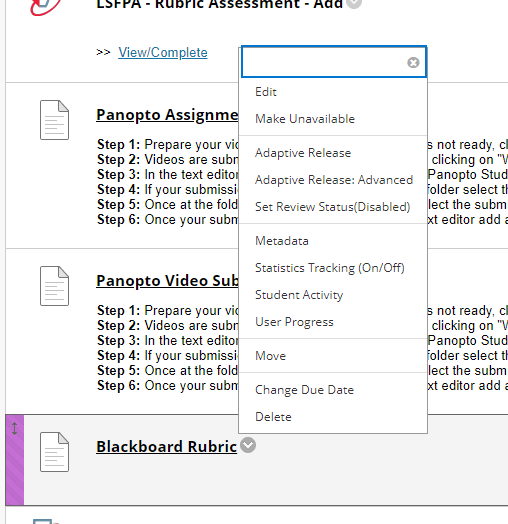
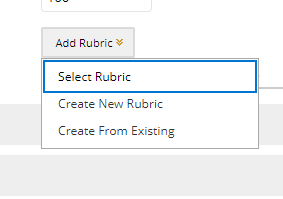
- Scroll down to the ‘Marking’ section of the edit window and choose ‘Add Rubric’.

- Choose ‘Select Rubric’
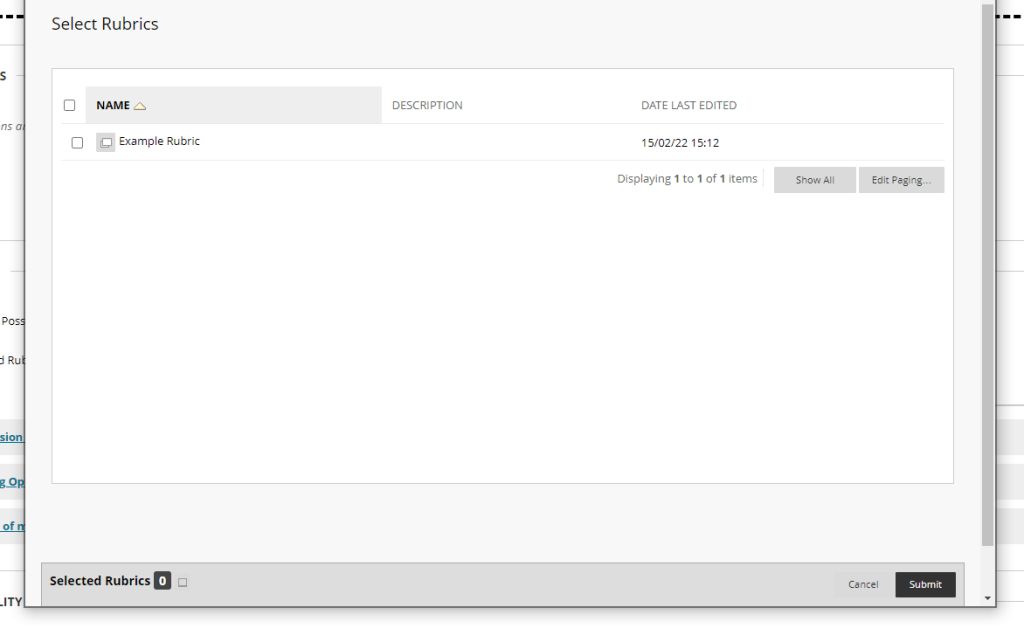
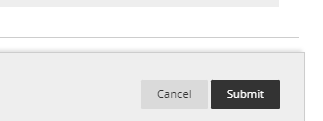
- Tick the rubric you wish to use in the next window that loads, press ‘Submit’.
- The rubric will be attached to your submission

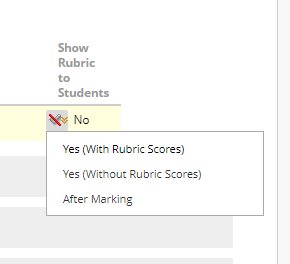
- Under ‘Show Rubric to Students’ choose the appropiate option for your submission (with or without rubric scores).
- Click ‘Submit’ to save your changes
Marking with a Blackboard Rubric
- Go to the Grade Centre or Needs Marking and find a student submission to mark in the usual way.
- Open the blue menu within the marking screen to see the ‘Feedback to Learner’ box.
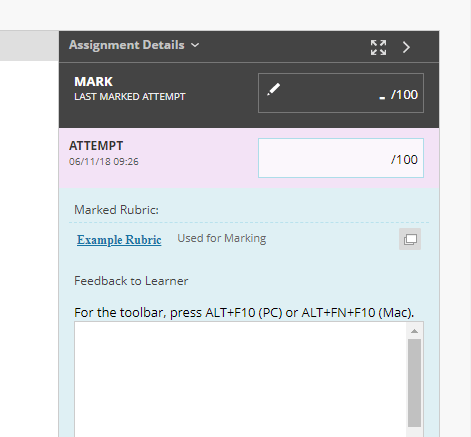
- You can see the rurbic has been attached for marking. Click the rubric name or the grey icon to access the rubric.
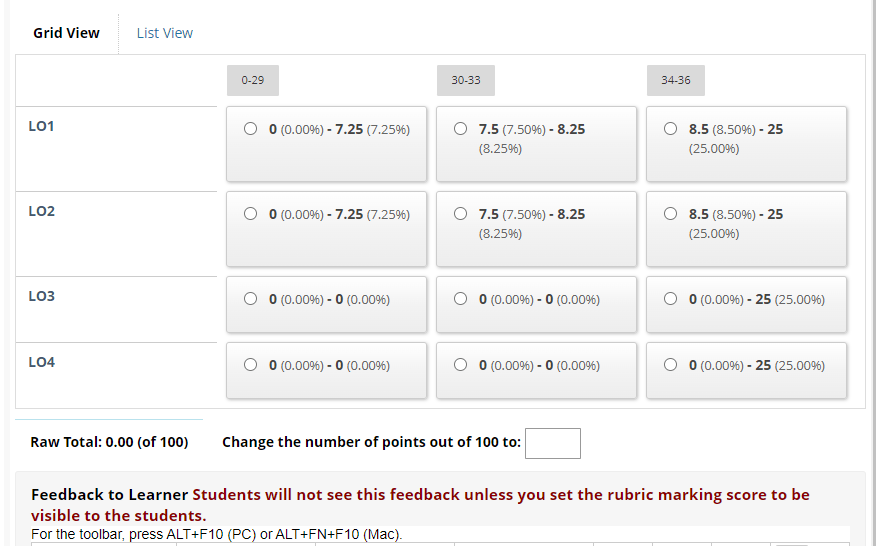
- Select the radio button in each column, you can select one per column.
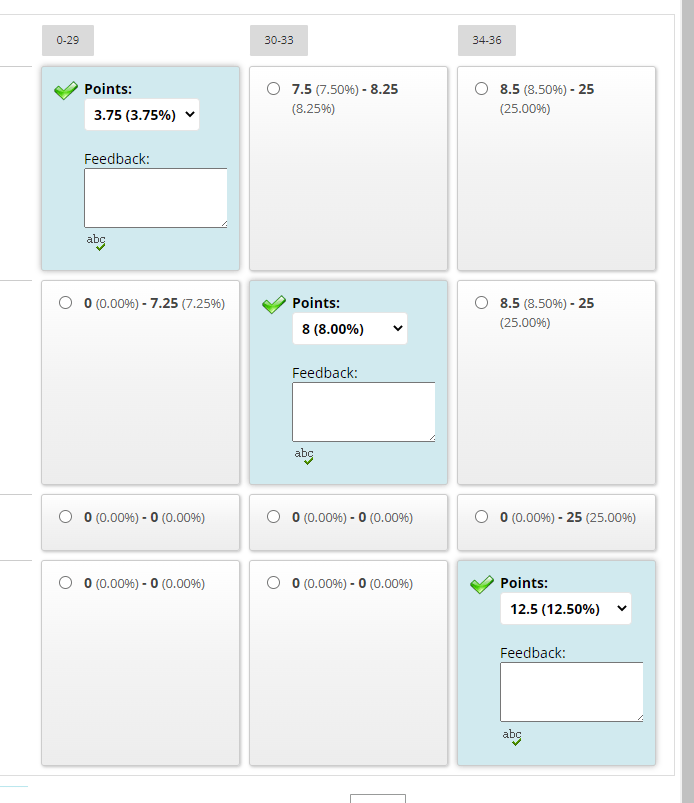
- When you have finshed marking this student, click ‘Save’ to apply the feedback and grade.

- Add a feedback comment in the ‘Feedback to Learner’ box.
- Repeat steps 1 – 6 above to mark the rest of the students.