Resources Hub
- Home
- Resources Hub
- Interactive Teaching and Learning in Microsoft Teams
- Using Breakout Rooms
Using Breakout Rooms
This helpsheet explains how you can use the new Breakout rooms feature within Microsoft Teams in your teaching.
What are Breakout Rooms?
The breakout rooms feature allows you to divide the attendees within your session into smaller sub-groups for a period of time, with the aim of promoting and facilitating discussion and ideation, and this feature is now available in Teams meetings and Teams channel meetings. The Teams ‘Organiser’ can easily navigate through the breakout rooms just as they would in a face-to-face environment, with the ability to deliver session-wide ‘announcements’ as necessary. The breakout rooms are interactive, and participants can make the most of Teams features such as the use of a whiteboard, chat, raise hand, recordings, and sharing of files for collaborative working in that time period.
The organiser can:
- Create breakout rooms from a meeting (including channel meetings).
- Automatically or manually split participants into rooms.
- Quickly join any of the breakout rooms.
- Switch attendees to a new room.
- Broadcast announcements to all rooms simultaneously.
- Rename rooms and delete rooms.
- Choose to automatically send and bring participants back from and to main meeting.
- Choose to allow participants to come back to the main meeting at any time.
- Access meeting files, whiteboards and other artefacts after the meeting in chat.
- Recreate rooms from scratch.
As an attendee, students can:
- Ask organiser to join their room for support.
- Receive announcements, alerts, and private messages.
- Record, whiteboard, chat and share files.
- Return to main/room meeting on their own (if enabled).
Files, recordings, and notes from a breakout room can be accessed in its Chat. You and your students will be able to access these materials after the room has closed, but students will not be able to chat or add additional materials.
Enabling the Feature – Meeting Organisers and Participants
In order to be able to use the breakout room feature, you will need to ensure that you have enabled the ‘New Teams Meeting Experience’. This can be done by following these steps:
- Click on your profile image within the Microsoft Teams interface.
- Select Settings from the menu.
- In the ‘General’ Tab, under the ‘Application’ heading, you will see the option to ‘Turn on new meeting experience’, click within the checkbox to turn this on.
- Restart your Teams client.
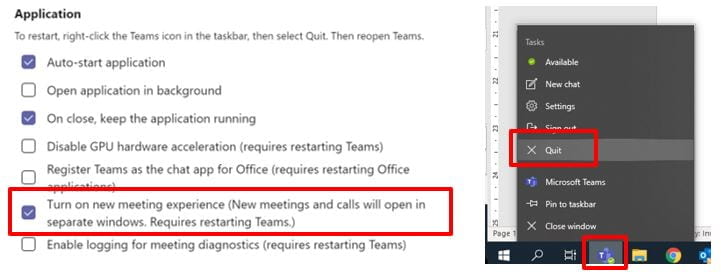
Note: It is important to note that closing your main Teams window does not count as a restart, in order to completely refresh your Teams session, on a Windows machine right-click the Teams icon in your taskbar and select ‘Quit’. For Mac users you can use the CMD+Q command or click Microsoft Teams in the top-left of the Finder menu bar and click Quit from the drop-down menu.
Setting up Breakout Rooms
Option 1 : Setting up during a Session
As a meeting organiser, you are the only person who is able to start breakout rooms in your session, meeting attendees and presenters will not see the breakout rooms option. You will find the breakout room option next to the raise hand control.
To begin creating breakout rooms in your Microsoft Teams session, complete the following steps:
- Click the Breakout Room Icon.
- You can then decide how many rooms need to be created, as well as how many, and in what way, the participants are distributed across these spaces.
- If you choose to ‘Assign automatically’, Teams will divide the number of attendees by the number of rooms available and allocate accordingly.
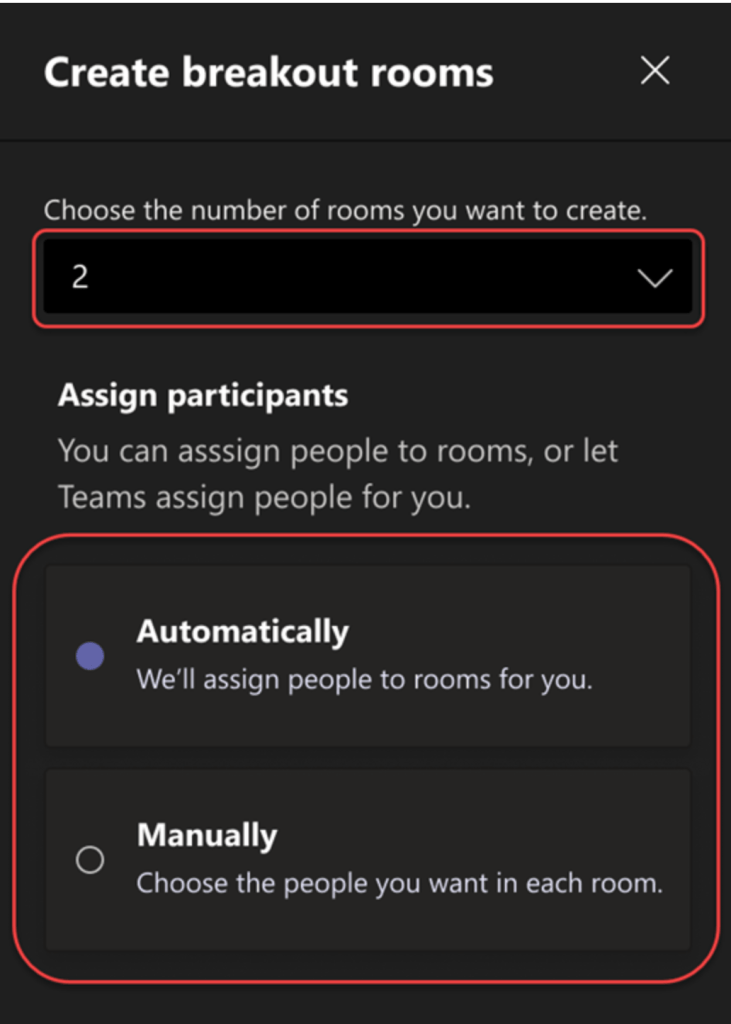
- If you choose to ‘Assign manually’, Click on Assign and then choose checkbox next to participant names to assign them to a particular room. Use dropdown to select the room.
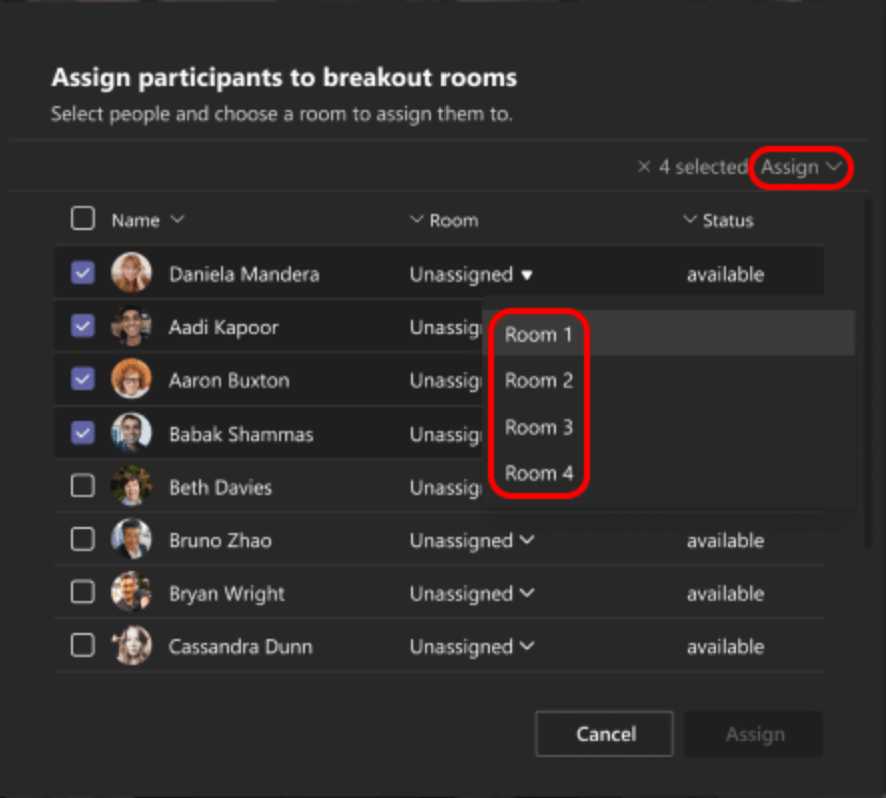
This screenshot is taken from Microsoft Support page
- The rooms will be closed initially. To open the rooms individually, select More next to the room, then Open room. To start rooms all at once, select Open rooms.

Option 2 : Setting up before the session
- Open your Teams calendar and locate the meeting invite for the desired meeting.
- Within the meeting invite, navigate to the “Breakout rooms” option and click on it.
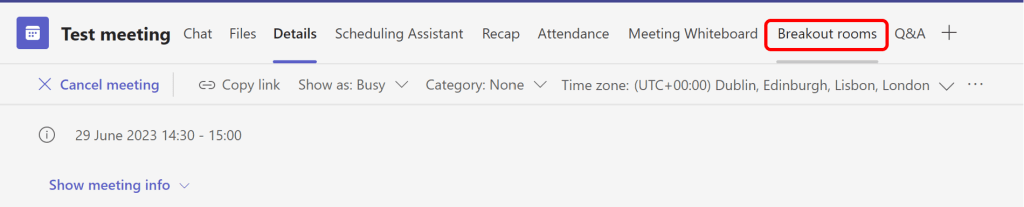
- A menu will appear where you can select “Create rooms.”

- Choose the number of breakout rooms you want to create, keeping in mind that you can create up to 50 rooms. Click on “Add rooms” to confirm.

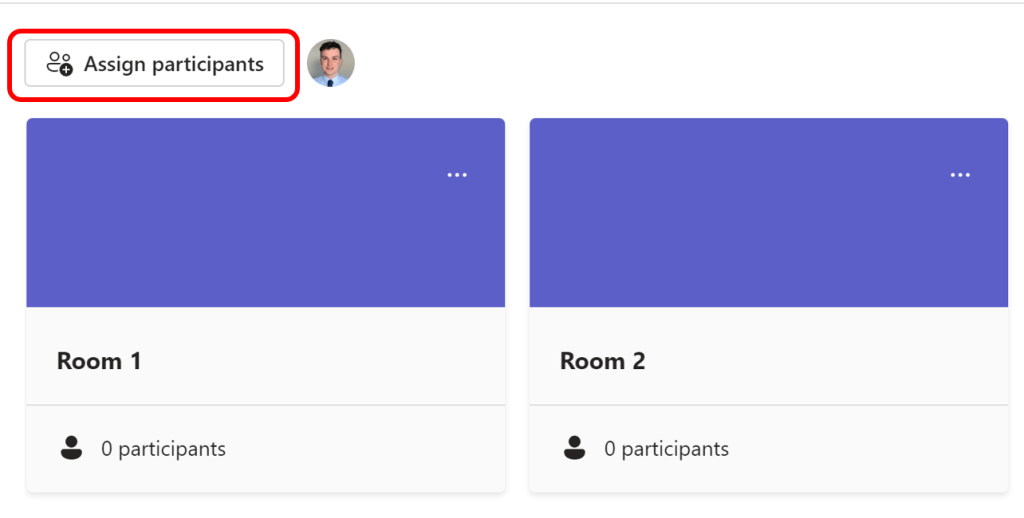
- At this point, the breakout rooms have been created, but no participants have been assigned to them yet.
- To assign participants, click on “Assign participants.”
- You have two options:
- If you want Teams to automatically assign participants to the breakout rooms, choose “Automatically.”
- If you prefer to manually assign participants to the breakout rooms, select “Manually.”
Once the meeting starts, you can open the breakout rooms and begin the session.
Customising Breakout Room Settings
There are two room settings that you can toggle on and off depending on your desired experience, these are ‘Automatically move participants to rooms’ and ‘Participants can return to the main meeting’.
By default, breakout rooms will be set to automatically move students into opened rooms. If you’d like to change this setting: Select More options and then click Rooms settings. When the automatic setting is turned off, students will receive a message asking them to join a breakout room. They will need to select Join room before being moved.
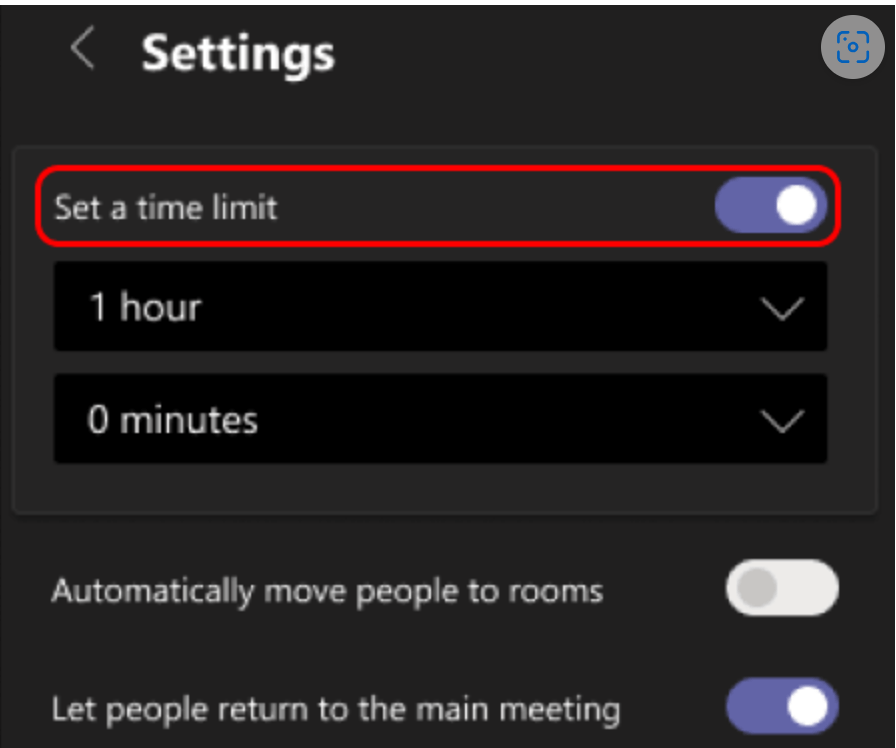
Participants can also be given the option to return to the main meeting room when they choose, therefore not dictated by the organiser when they bring individual or all rooms back to the main room as a specific time, this can be turned off in the Rooms settings area. There also an option to choose the time limit for breakout room
Interacting with Breakout Rooms
Joining a Breakout Room
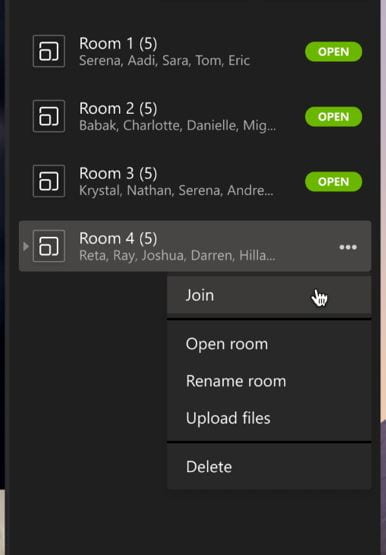
In order to join a breakout room, select the room from the list in the breakout room menu and click the More Options menu, you can then click Join from the menu. This will put the main meeting room on hold and open a new Teams window for the breakout room. As the organiser you can then leave this breakout room and return to the main meeting space.
Making an announcement
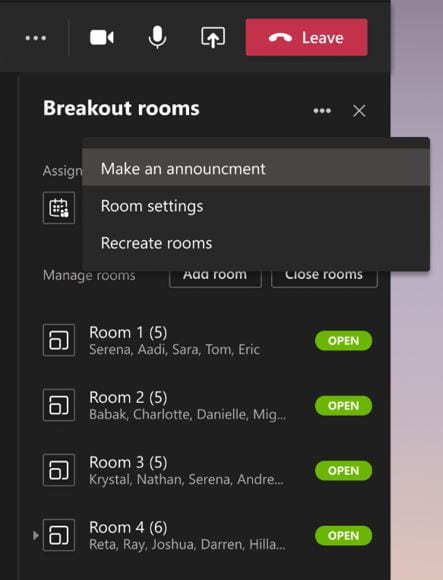
To make an announcement to all breakout rooms, click the More Options button at the top of the Breakout Rooms menu, and choose Make an Announcement. You can then type your message and press send.
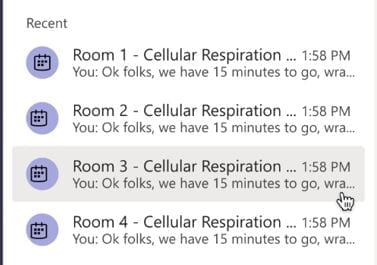
Join a breakout room from the chat
To see all breakout rooms from a glance, open your main Teams window, and click the ‘Chat’ tab from the left-hand menu, here you will see a list of your current breakout rooms in the Recent area. You can navigate between these adding individual messages as required or click Join to become a participant.
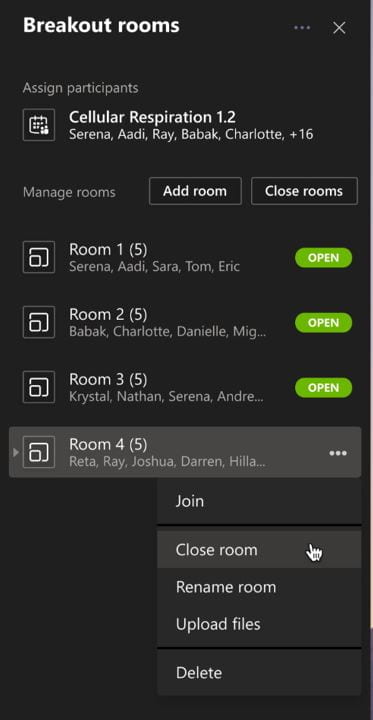
Closing a specific breakout room
To close a specific breakout room and return the students to the main meeting room, hover your mouse over the room you want to close, click the More Options menu, and choose Close room from the list.
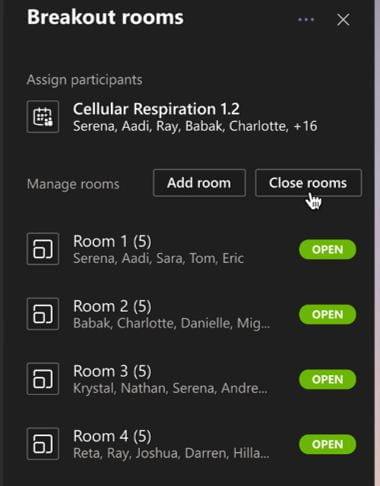
Closing all breakout rooms at the same time
To close all breakout rooms at the same time, click the Close rooms button next to the Manage rooms text.
Frequently Asked Questions
Can organisers create breakout rooms using a mobile device, or in the web-based version of Teams?
You can only set up breakout rooms from the desktop client, but not in mobile or the web.
Will students be notified when I am about to return them to the main room?
Yes. A banner will appear at the top of the Teams interface to warn that they are about to be returned.
Can students leave a breakout room before I pull them back to the main room?
Yes. If a student leaves the breakout room, they will need to re-join the call to enter the main room.
If a student experiences technical difficulty, how do they re-join a breakout room?
Where a student find themselves not in a breakout room they should go back to the team and join the original meeting, where the organiser can then relocate them to the correct room.
Do students lose access to the breakout room once they return to the main meeting room?
The breakout room will persist as a chat in the student’s Teams chat window. This is important to remember when naming your participant rooms; using vague identification such as room 1, room 2 may become confusing. The files and chats shared in that breakout room remain accessible following the breakout session, however students cannot make new interactions with the room once breakout sessions have ended.