Resources Hub
- Home
- Resources Hub
- Managers and Administrators
- Creating Individual User Accounts
Creating Individual User Accounts
Centre Managers and User Managers have the ability to create a range of user accounts in One File. Whilst there are very few differences between a Centre Manager and a User Manager, it is helpful to understand the following restrictions in relation to user account creation:
- Centre Managers can create any account apart from the External Verifier role.
- User Managers can create any account accept from Centre Manager, User Manager and EV accounts.
If you do not have sufficient priviledges to create a required user role, or are unsure which user role should be created for a member of the programme team or an external user, you should contact the Digital Education Team in the first instance who are best placed to advise and support (email digitaleducation@lincoln.ac.uk).
Additionally, as a general rule of thumb, you should create all of your programme team users (tutors, employers and observers) before you create your learners. However, it is possible to create a Learner provided that at least one Assessor has been created in the Centre.
Creating an Individual User Account
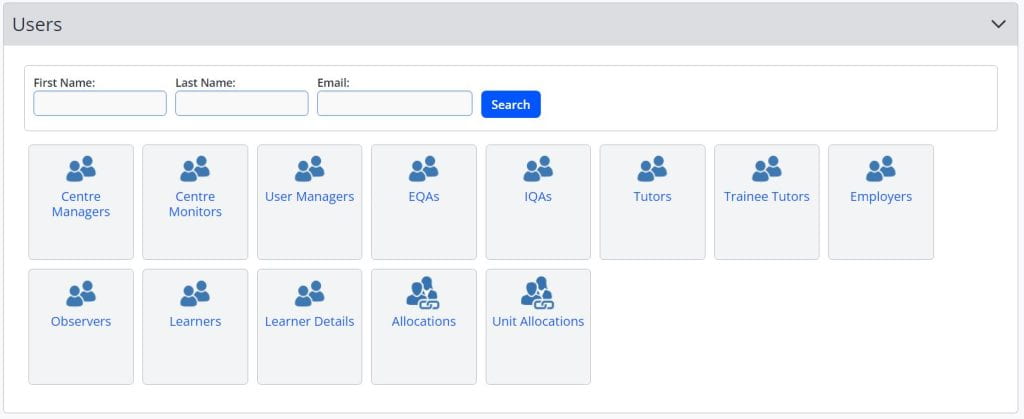
When you have logged into One File as a Centre or User Manager, you will be presented with a range of tabs, these can be accessed either by scrolling down the webpage or by using the quick navigation links on the menu located on the left-hand side. The third tab down on the page is titled Users, and will provide an image of each user role that can be created in One File, you may find that some user roles have their terminology adjusted to suit the apprenticeship programmes i.e Employers may be labelled as Mentors or Line Managers.
To begin creating users, select the relevant user role from the presented icons, or select the Users tab from the quick navigation links on the menu located on the left-hand side.
Tutor and Assessor Accounts
What is the Tutor Role?
The ‘Tutor’ is the qualified user role associated with the direct assessment of the portfolio, they review all evidence uploaded by the learner and provide feedback in relation to the knowledges, skills and behaviours of the apprenticeship framework. They also schedule and record all information for tripartite reviews and sign off each unit as they are completed by the learner.
How are Tutor Roles Created?
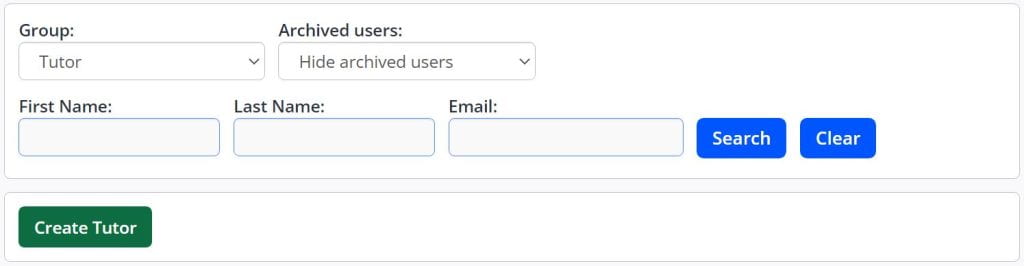
When accessing the ‘Tutors’ area of the Users tab, you will see a green Create Tutor button displayed just below the filtering options for existing users, including the ability to search by first and last name, as well as email address.
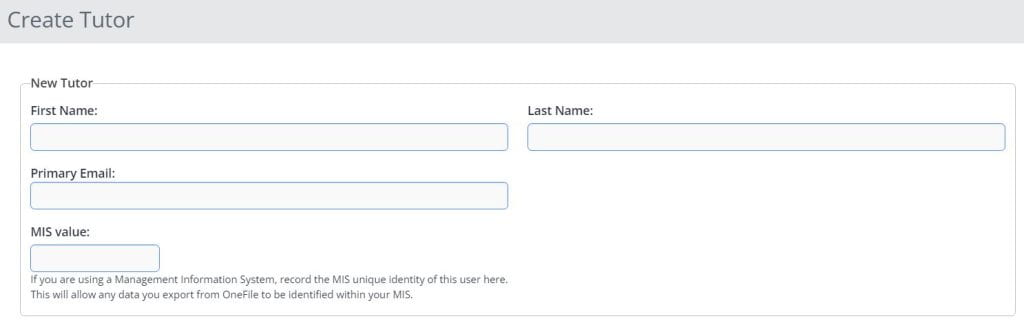
- Click Create Tutor to begin creating a new Tutor account.
- The Tutor role requires a First Name, Last Name and Primary Email Address.
- There is also the option to add a MIS Value, at present we do not record or store these in One File, and you can leave this value empty.
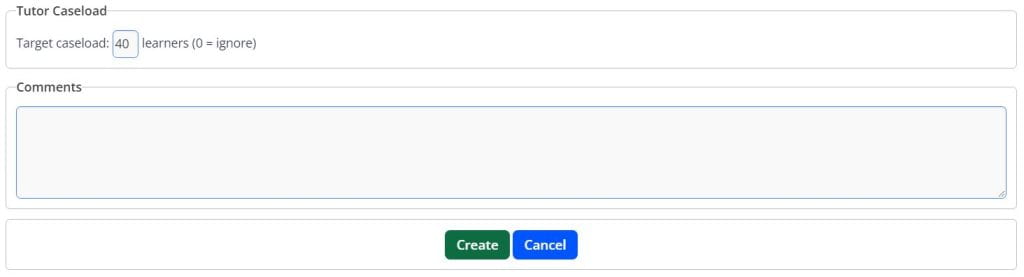
- In addition to the details above, you can add a Target Caseload. The Target Caseload Value is a label used for reporting purposes indicating the ideal number of apprentices the tutor will have allocated to them at any given time, this can then be reported on to assess learners who have too many, or too few, learner accounts allocated to them. It does not prevent a tutor from being assigned more than this value, and can be ignored by simply entering 0 as the value.
- The last step allows you to add any comments associated with the user’s accounts, these comments are only visible to Centre and User Managers, and is not a mandatory field during the creation process.
- Click Create to create the user. You will be displayed a body of text explaining how to log in, and the username and temporary password for that user, you can copy and paste this into your own email and send to the user. Further information on resetting and automatically sending password details at the end of this guide.
Employer and Mentor Accounts
What is the Employer Role?
The ‘Employer’ is an interactive role used in the assessment process, e.g. an employer or (expert) witness that may sign assessments and provide evidence for the Learner.
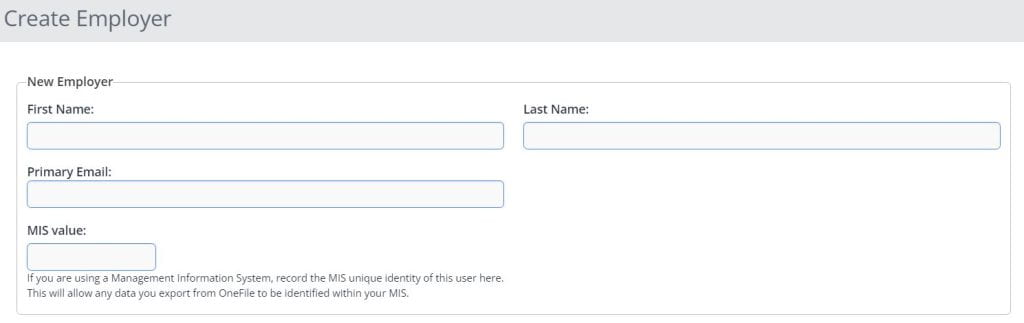
How are Employer Roles Created?
- Click Create Employer to begin creating a new Employer account.
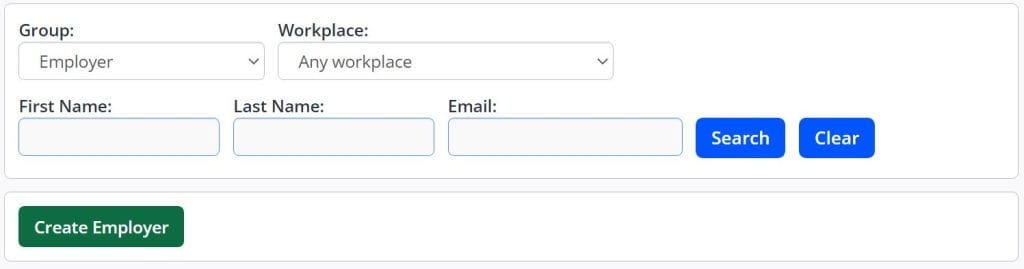
- The Tutor role requires a First Name, Last Name and Primary Email Address.
- There is also the option to add a MIS Value, at present we do not record or store these in One File, and you can leave this value empty.
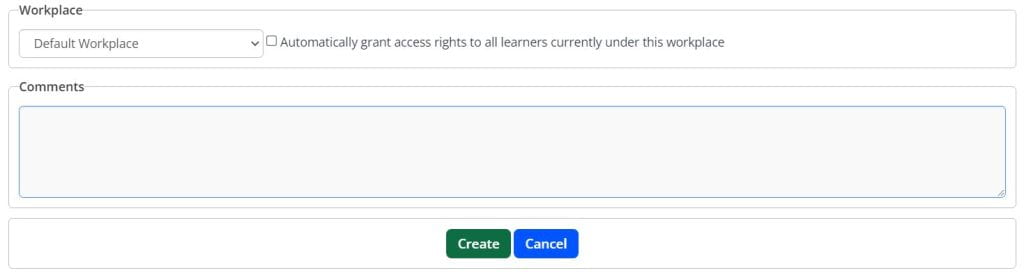
- The Workplace value (or Placements depending on terminology) reflects the organisation that the Employers works for and where the Learner is completing their placement. Workplace locations can be created in the ‘Centre’ tab of the Centre and User Manager homepage.
- We advise that you do not tick the box for ‘automatically grant access rights to all learners currently under this workplace’.
- The last step allows you to add any comments associated with the user’s accounts, these comments are only visible to Centre and User Managers, and is not a mandatory field during the creation process.
- Click Create to create the user. You will be displayed a body of text explaining how to log in, and the username and temporary password for that user, you can copy and paste this into your own email and send to the user. Further information on resetting and automatically sending password details at the end of this guide.
Learner and Student Accounts
What is the Learner Role?
The ‘Learner’ (or the student) is the apprentice who is taking a qualification delivered by the University of Lincoln and needs an account in One File to create and maintain their apprenticeship portfolio. Learners are able to add evidence and files to the portfolio, receive tasks and send assessments to their tutor and track their own progress.
How are Learner Roles Created?
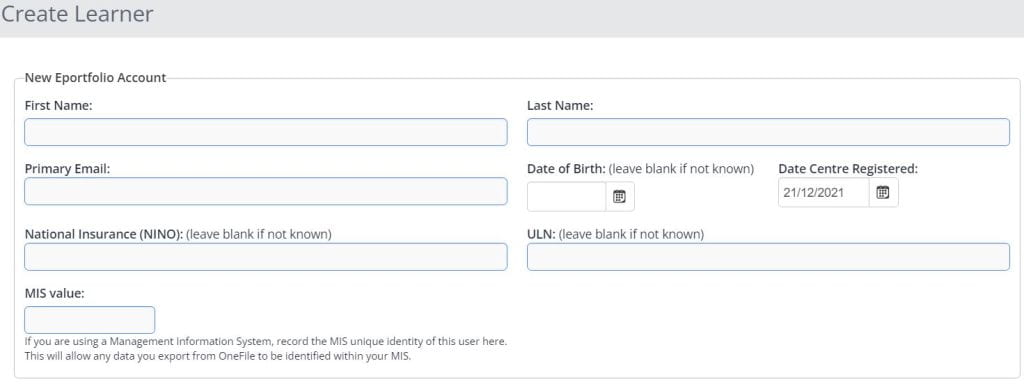
- Click Create Learner to begin creating a new Learner account. Please note that it is possible to bulk import learners using a CSV file, for guidance on creating learner accounts en masse, please visit the Digital Education Resources hub and review the relevant guidance. This guide will detail how to create an individual learner.

- The Learner role requires a First Name, Last Name and Primary Email Address.
- There is also the option to add a MIS Value, at present we do not record or store these in One File, and you can leave this value empty.
- You can enter the National Insurance Number (NINO) and the Unique Learner Number (ULN) if required.
- The Date of Birth and Date Centre Registered should be recorded during the account creation process. The Centre Registered date will default to the date you are creating the learner account on.
- The Details Details tab (often labelled as the Episode Details in most of the University of Lincoln Centres) refers to the setup of the apprenticeship portfolio. You will need to select the Default Tutor from the drop-down box, if a user is not presented in the list, you need to create their account before you create the learner.
- The Group (or Cohort in most University of Lincoln Centres) is used to group learners together, this is often setup to reflect the apprenticeship programme and the month and year their programme begins.
- The Workplace (or Placement) should correctly reflect the location that the learner is completing their apprenticeship. This will often be identical to the workplace value assigned to their Employer, though it does not have to be the same for an Employer account to be associated with the Learner.
- The Framework Template automatically assigns the relevant Learning Aims to the Learner (this includes the Apprenticeship Standard, the Gateway to End Point and the End Point Assessment), it will also calculate the anticipated end dates based on the cohort start date and the learning aim duration.
- The Details Start Date (or the Episode Start Date) should be inputted to reflect the Cohort Start Date.
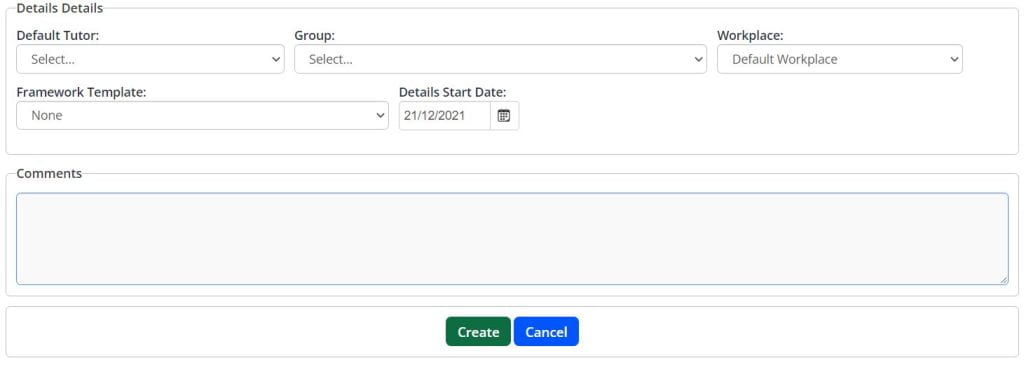
- Click Create to create the user.
Support with Centre Setup and Management
If you require support with the setup or management of your One File Centre, please contact the Digital Education Team by emailing digitaleducation@lincoln.ac.uk. For queries relating to non-technical support and about the operation of your apprenticeship programme, you should contact the University of Lincoln’s Office of Quality, Standards and Partnerships.