Resources Hub
- Home
- Resources Hub
- Getting Started
- Creating a Turnitin Assignment – Blackboard Original
Creating a Turnitin Assignment – Blackboard Original
As part of the setup process, as with all assessments in Blackboard, you should access the Full Grade Centre and use the ‘Hide from students (on/off)’ function, to prevent students from accessing grades earlier than intended through the Grade Centre.
- Login into Blackboard and navigate to the module site you wish to create a Turnitin Submission point in.
- Locate the Assessments tab of your module, and (if required) open the folder relevant to your assessment.
- Next, place your mouse cursor over the ‘Build Content’ button at the top of screen, and then select the ‘Turnitin Feedback Studio (New)’.
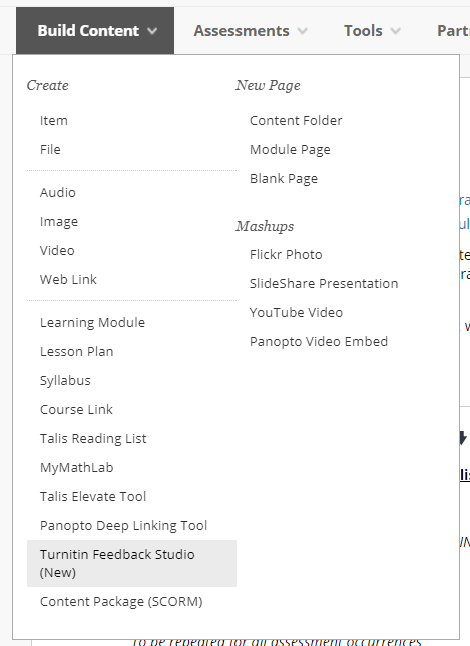
You can now begin completing your assignment details.
- Enter a clear title, and descriptive instructions, for your students about the assignment.
- Then, the maximum grade available (100 points).

- The start date will control when students can begin submitting to Turnitin. To adjust the date and time, click on the calendar icon and select the relevant start date, then select the clock icon, to adjust the hours and minutes.
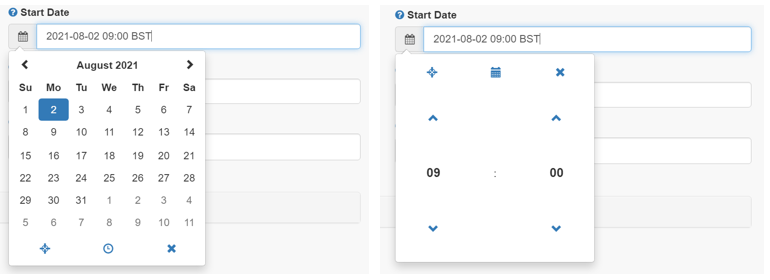
- The Due Date, will indicate when a submission should be completed by, and when it will be considered late.
- You will notice the Post Date, is now labelled the Feedback Release Date. Unlike in the older version of Turnitin, you no longer need to explicitly state whether or not grades are revealed to students on this date.
Adjusting the Optional Settings for your Assignment
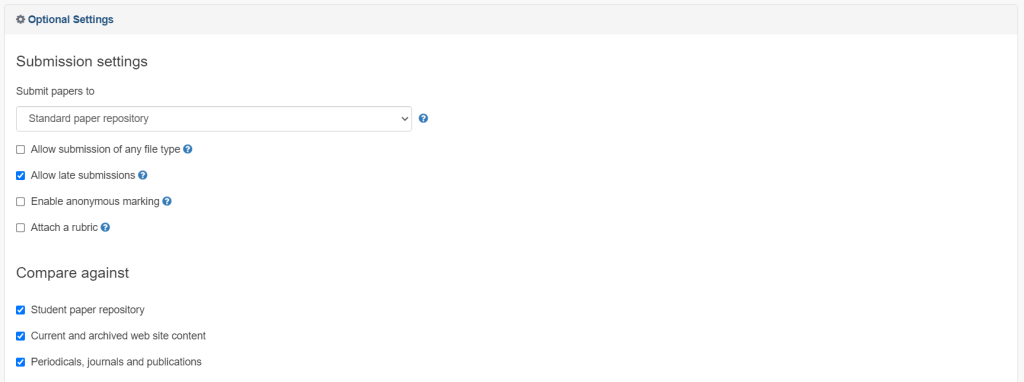
When you are happy with the assignment details, you can expand the ‘Optional Settings’ menu, to further customise your assignment. You can hover the mouse cursor over the blue circle icon at the end of each section for a full description on that option.
There are a range of optional settings for your assignment, these include:
- Submitting papers to the standard paper repository, or to not store them.
- Allowing submission of any file type.
- Allowing late submissions.
- Enabling anonymous marking.
- Attaching a rubric.
- And selecting which sources a paper should be compared against.
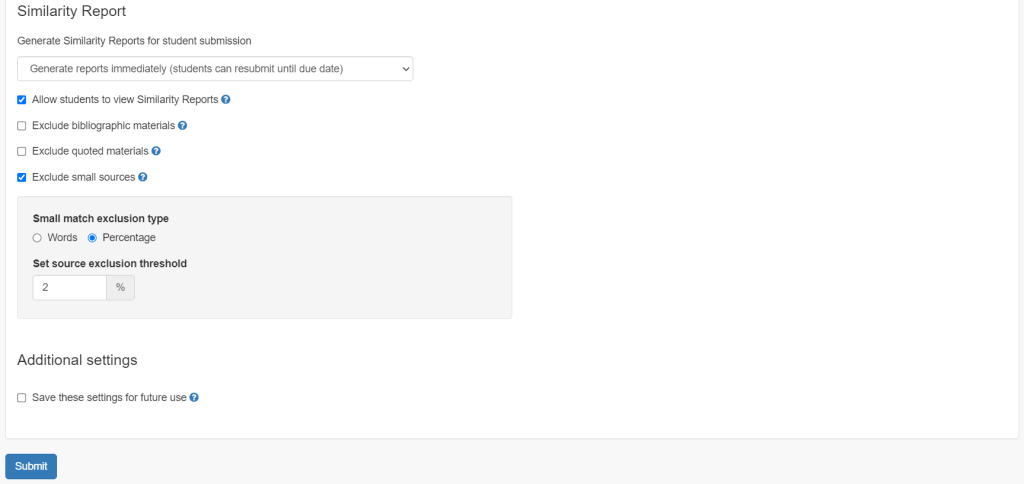
As well as further customisation referring to the similarity reports and plagiarism detection, these include:
- Options for generating similarity reports for student submissions.
- Allowing or preventing students accessing similarity reports.
- Excluding bibliographic materials.
- Excluding quoted materials.
- Excluding small sources.
Note: Rubrics from the current version of Turnitin will be available in the new version.
Click Submit when you are happy with all the options.
You have now successfully created a Turnitin submission point.
Accessing the Assignment Inbox and Amending Assignment Settings

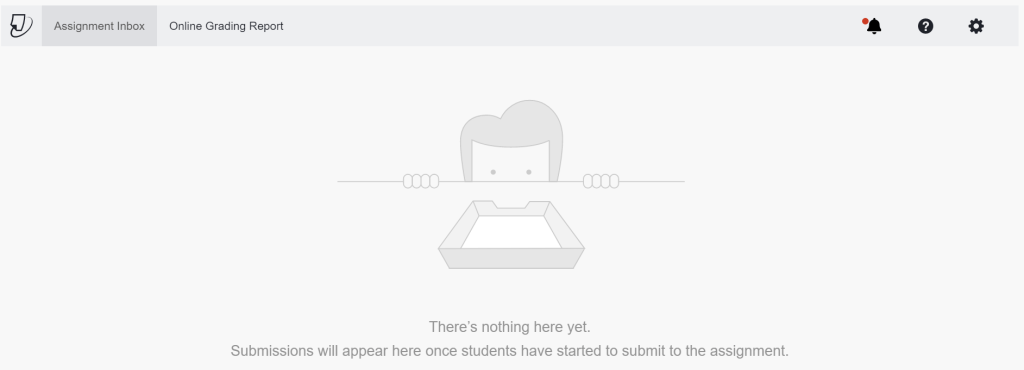
- To access the Assignment Inbox, you can simply click the title of the assignment.
- From this inbox, you can upload on behalf of a student, and begin marking and providing feedback.
- To edit the Turnitin Assignment settings, you can click the cog icon in the top right of the screen.
This is a small change to the previously used Turnitin tool, so be sure to look out for the ‘Turnitin Feedback Studio’ button inside ‘Build Content’ whenever you’re setting up a new Turnitin submission.