Resources Hub
- Home
- Resources Hub
- Getting Started with Panopto
- Panopto Video Feedback Folders
Panopto Video Feedback Folders
This help guide will guide you through the process of creating video feedback folders for students in Panopto. These folders allow you to record and upload videos that are only accessible to the instructors on the module and the specific student that feedback relates to.
Note: you should continue to provide grades and textual feedback through the Grade Centre or through Turnitin depending on the assignment.
Release: please be aware that although your videos will be immediately available to students, you will need to contact them via an Announcement to confirm the videos have been uploaded, as they will not be notified about this when you record to the folder.
Step 1 – Access your Panopto Module Folder
- Firstly, login to Blackboard and navigate to the module site where you want to provide video feedback.
- Then, on the left-hand menu, click on the Panopto link as shown in the screenshot below. This is will open the Panopto module folder.
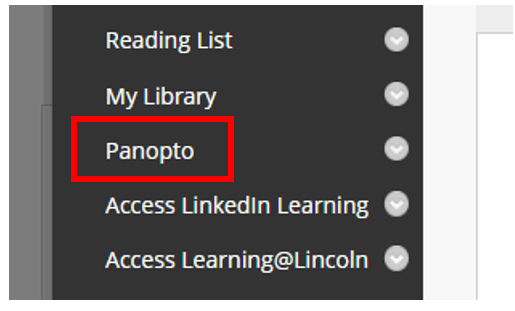
NOTE: this process is easier to complete using Panopto in the web, as you can easily use the ‘return’ icon shown below to move between each folder you have created and the video feedback host folder. To open Panopto in the Web click on the icon positioned in the top-right corner of the module folder page.

STEP 2 – Create a top-level Video Feedback Folder
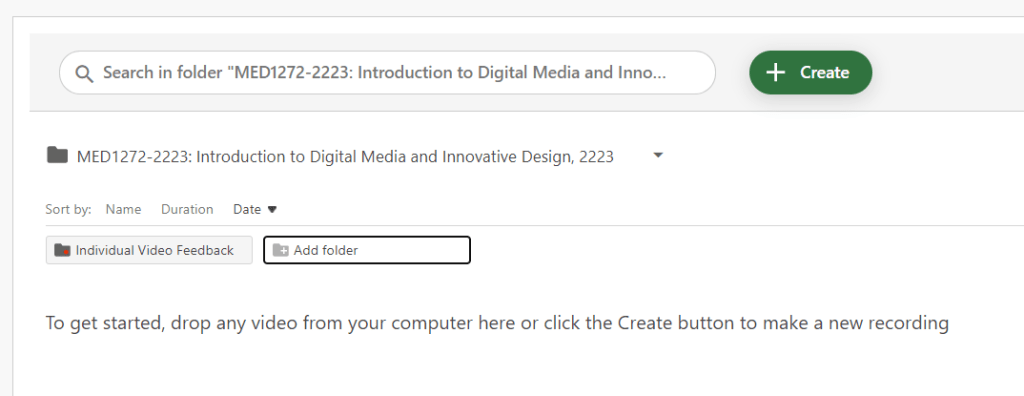
- Click on the ‘Create’ button and select ‘New Folder’. This will create a new folder for you. You can rename this folder as “Individual Video Feedback”.
Step 3 – Create Individual Student Folders
Within this video folder, you can proceed to create individual student folders. This process will need to be repeated for each student on your module.
- Click on ‘Add Folder’ to create a new folder, rename it according to the student’s name as it appears in Blackboard.
- Then, click on the folder to open it.

Step 4 – Edit the Sharing (Viewing) Permissions
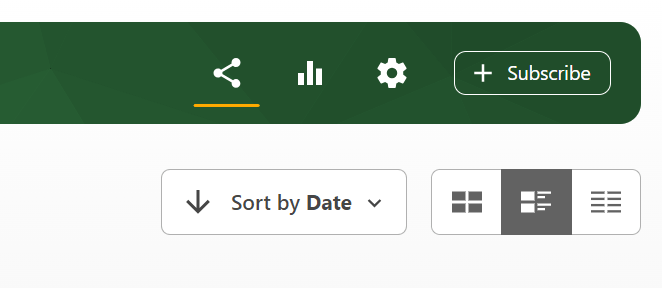
- After accessing the student’s folder, click on the sharing permissions icon.
- By default all instructors and all students have access to the folder. You will need to click ‘Change’ to amend these permissions.
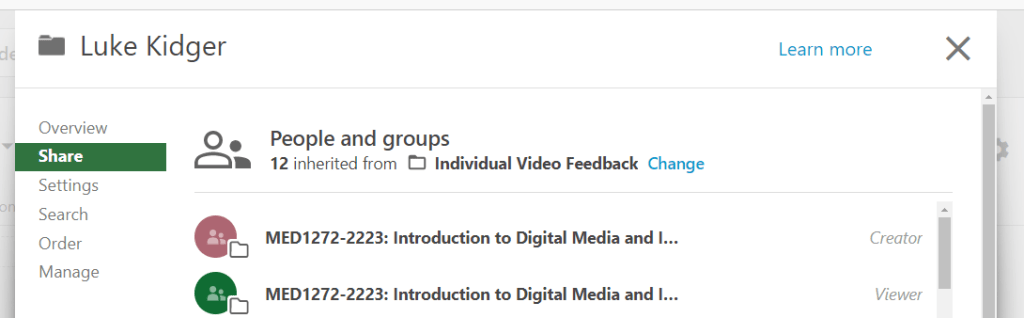
- You will be asked whether you want to retain the permissions, you should ‘keep the box ticked‘ and then select ‘stop inheriting’.
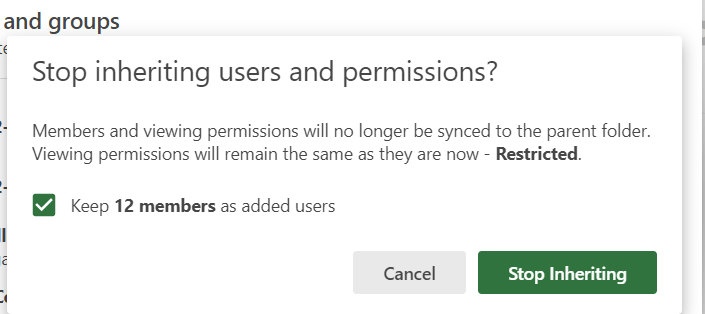
- Remove the ‘Viewer’ user group (the second user group in the list) by clicking the small X icon on the right hand side.
- Then search for the student’s name in the search bar. When you type in the name a list of users will display based on the entry. Locate the student in the list and select them. Note: some students may have a similar name therefore ensure that the ID matches the student on your module.
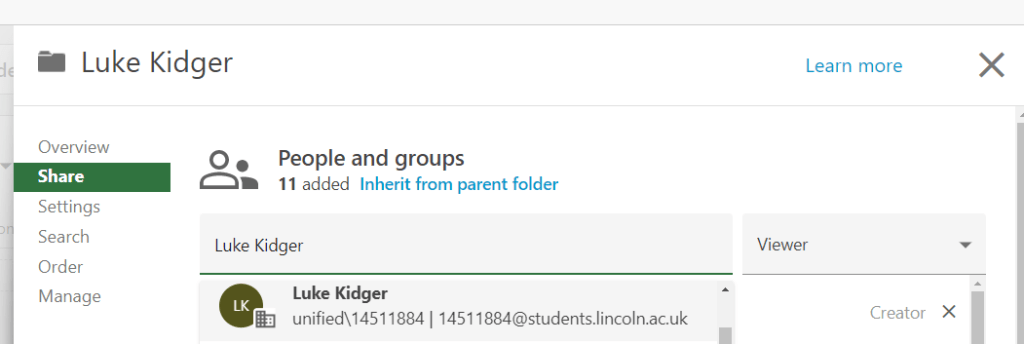
Note: if your students do not appear that means they have never accessed a Panopto content item, you will need to ask them to login to https://uol.cloud.panopto.eu/ or ask them to watch a Panopto video on the module.
- After selecting the student from the dropdown, untick the ‘send an email to notify people’ option.
- Finally, click ‘Save’.

You can now repeat this process as many times as needed for each student on your module.