Resources Hub
- Home
- Resources Hub
- Microsoft Teams
- Sharing a Link to a Teams Recording in Microsoft Streams
Sharing a Link to a Teams Recording in Microsoft Streams
This help page aims to provide you with a comprehensive, step-by-step guide on how to effectively share the recording link for a Microsoft Teams recorded session. Follow the instructions below for the sharing process.
Step 1 – Locating Recorded Sessions
- In the left-hand navigation panel, click on the ‘Teams’ tab or ‘Chat‘ . You can also select the relevant meeting through your Teams calendar.
- Locate the specific team or chat where the recorded session is stored and select it.
Step 2 – Accessing the Recorded Session
- Click on the ellipsis ‘three dots‘ next to recording tab in the Teams or chat.
- Next, choose the option ‘Open in Stream’. This action will launch a new browser window containing the recording you selected.

Step 3 – Sharing recording links
- Within the browser, you should find a ‘Share’ option located in the top navigation panel, positioned all the way to the right. Click on this option to access the sharing features.

- Once you click on the share button, a pop-up window will appear, presenting you with various sharing options to choose from.
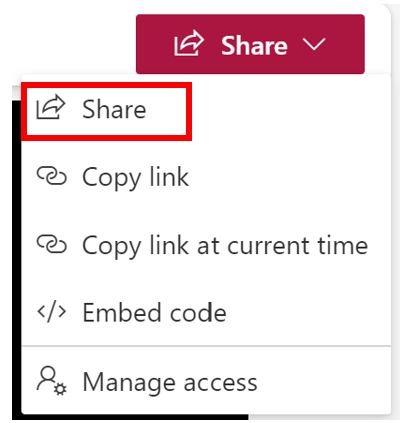
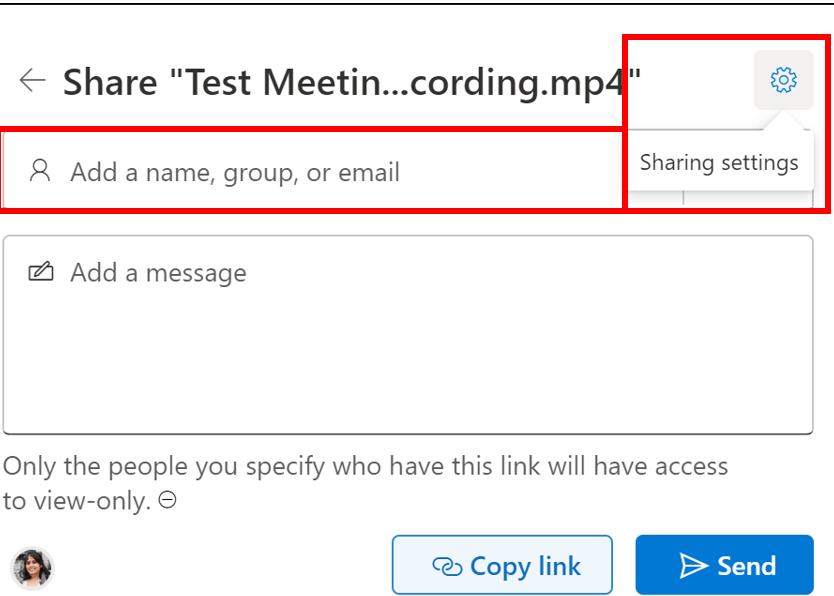
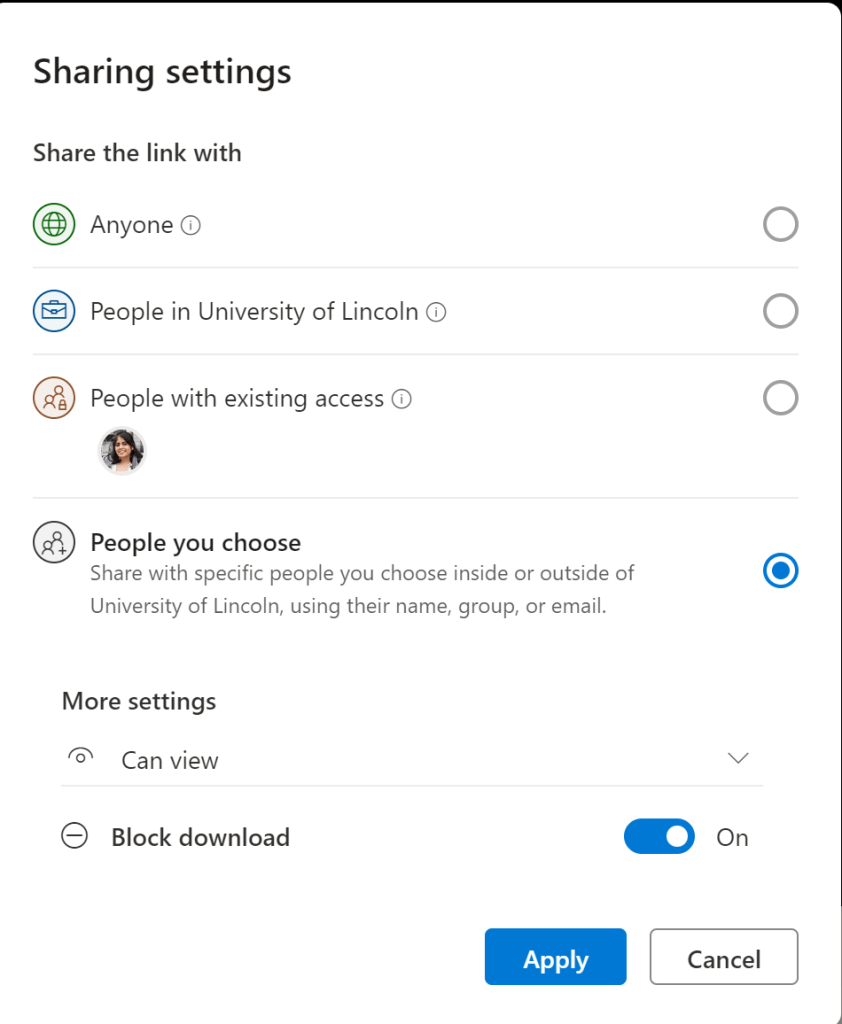
- Click on the ‘Share‘ option and enter the email IDs of the specific individuals you wish to grant access to. Once complete, click on the ‘Sharing settings‘ option. However, if you want to share the recording with everyone immediately, simply click directly on the ‘Sharing settings’ option.
- Next, select the option that best suits your needs or preferences. We strongly recommend only sharing links using the ‘People in University of Lincoln’ option, unless there is a specific reason why it would need to be shared externally. Always bear in mind GDPR and data sharing regulations in this instance, considering the content of the meeting/video.
- You can now email or copy and share the link.